Producing Protobuf data to Kafka
How to write Protobuf-based Kafka producer & consumer microservices with the Lenses Kafka Docker Box.
Until recently, teams were building a small handful of Kafka streaming applications. They were usually associated with Big Data workloads (analytics, data science etc.), and data serialization would typically be in AVRO or JSON.
Now a wider set of engineering teams are building entire software products with microservices decoupled through Kafka. Many teams have adopted Google Protobuf as their serialization, partly due to its use in gRPC.
In the latest version of Lenses, we now fully support Kafka data observability and Kafka stream processing with Protobuf schemas managed in a Schema Registry. In this blog, we’ll show you how to create your first application with Protobuf and explore this data in Lenses.
Protocol buffers is an open source data format introduced at Google in 2001, often combined with gRPC and found in microservice-based software architectures.
Several features of Protobuf make it a good fit for this type of direct service-to-service communication:
Protobuf allows several systems to agree on the format of messages and correctly typecast native to the programming language.
It allows for both backward and forward-compatible schema evolutions (i..e old consumers can consume messages from new producers/servers and vice-versa).
It has broad language support. Its protoc compiler can generate builder classes for most programming languages.
Its compact, binary format allows for faster performance when serializing/deserializing ( more than 5x faster than JSON).
So Protobuf makes sense with microservices and is gaining a wider appeal than AVRO. If Protobuf is so commonly used for request/response, what makes it suitable for Kafka, a system that facilitates loose coupling between various services?
Loose coupling in Kafka increases the likelihood that developers are using different frameworks & languages. A schema like Protobuf becomes more compelling in principle, transferring data securely and efficiently.
Confluent Platform 5.5 has made a Schema Registry aware Kafka serializer for Protobuf and Protobuf support has been introduced within Schema Registry itself.
And now, Lenses 5.0 is here. It provides first-class Protobuf support:
Browse messages using SQL
Explore & evolve schemas across any Kafka infrastructure
Apply data redaction/masking, and
Build stream processing applications with SQL syntax.
Let’s go over an example of interacting with Protobuf data. To see an end-to-end (local) flow, we will:
- Build a basic application that produces Protobuf data (in Java)
- Send that Protobuf data to Kafka
- Explore the data in Lenses Box
- Consume the data through a Node.js application
Docker installed
Java/Maven installed
An IDE (we will be using vsCode on our example)
NPM/Node installed
Before we begin, let’s get to know our tools and how they interact with each other:
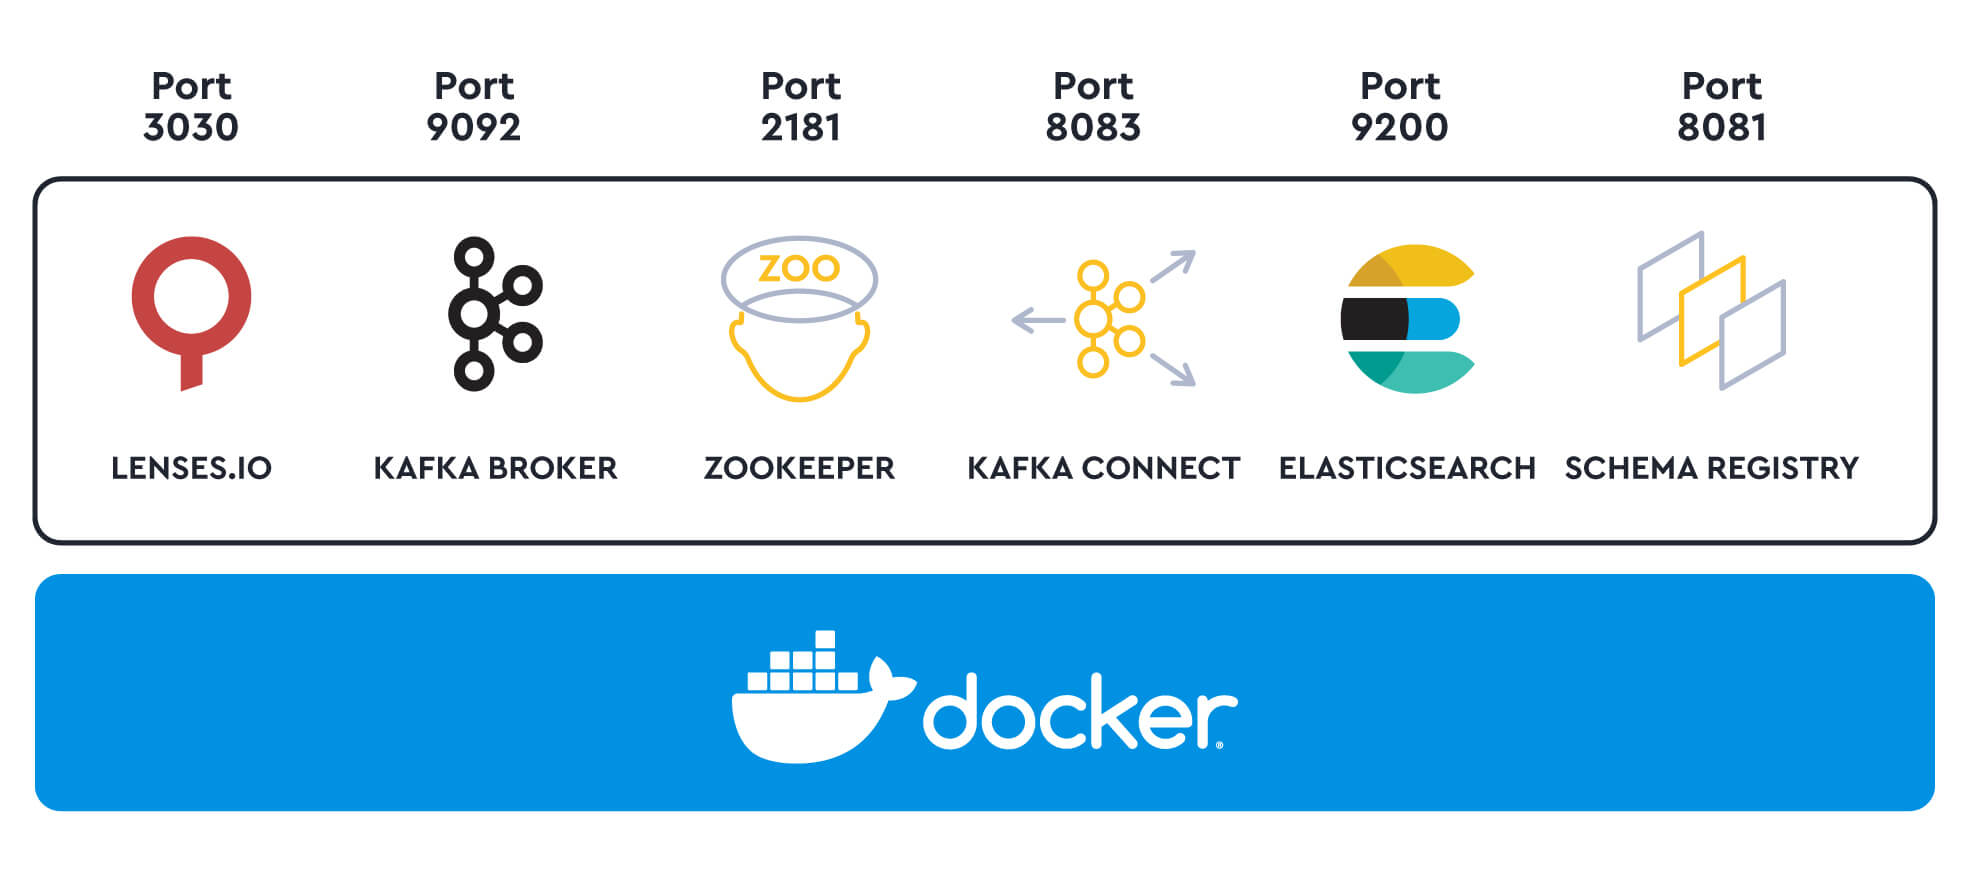
Lenses Box allows us to connect applications to a localhost Apache Kafka docker inside a container.
Apache Kafka, Schema Registry, and an ecosystem of open source Kafka tools are already pre-configured for us in a single Docker. Perfect for us, since we don’t need to spin up each of these services independently:
Schema Registry allows us to maintain a repository of schemas that our applications will depend on, interacting via Producer and Consumer applications to provide a reliable single source of truth.
The producer checks for the schema in its cache prior to sending the data.
If the schema is not found, the producer first sends (registers) the schema in the Schema Registry and gets back the schema ID.
It then produces the serialized data to Kafka along with the schema ID.
Similarly, when consuming data, the consumer first checks its local cache to find the schema using the schema ID.
If not found, it sends the schema ID to the Schema Registry and then gets the schema back.
It deserializes the data.
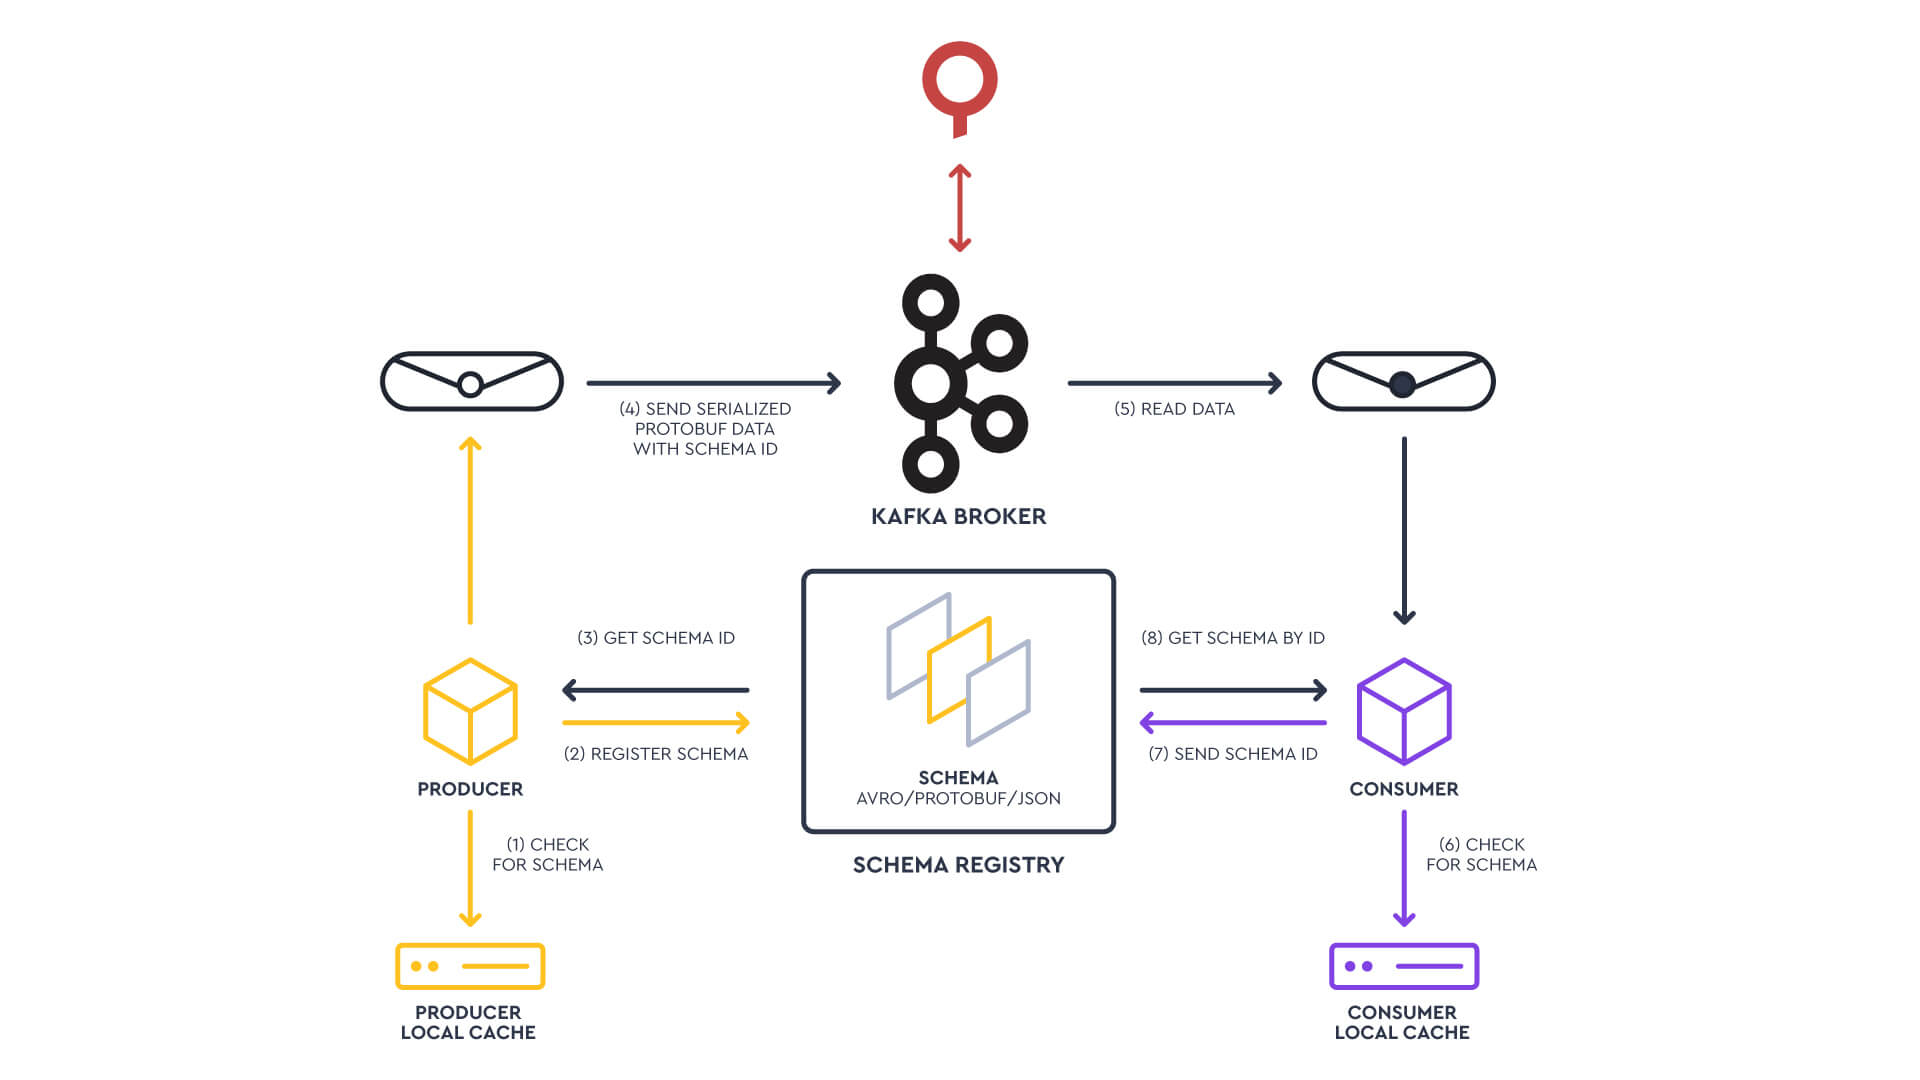
Similarly, we will serialize our data based on the Protobuf schema, store the schema in the Schema Registry, retrieve the Schema ID, and then produce the message to our Kafka Topic. Afterward, we will be consuming those messages from our Node.js app following the flow of the diagram.
Let's dive into this!
Start by setting up a running Lenses Box.
First, sign up for a Lenses Kafka Docker box. Make sure you have Docker running, open a new terminal window, and start Lenses with the following command:
Note: If you copied the command from here make sure to also export ports 8081, and 8181 as shown on the command above.
In case you receive a warning of type: “Operating system RAM available is less than the lowest recommended”, make sure to increase your docker RAM for Lenses to work properly.
Access: http://127.0.0.1:3030 and log in with credentials admin/admin:
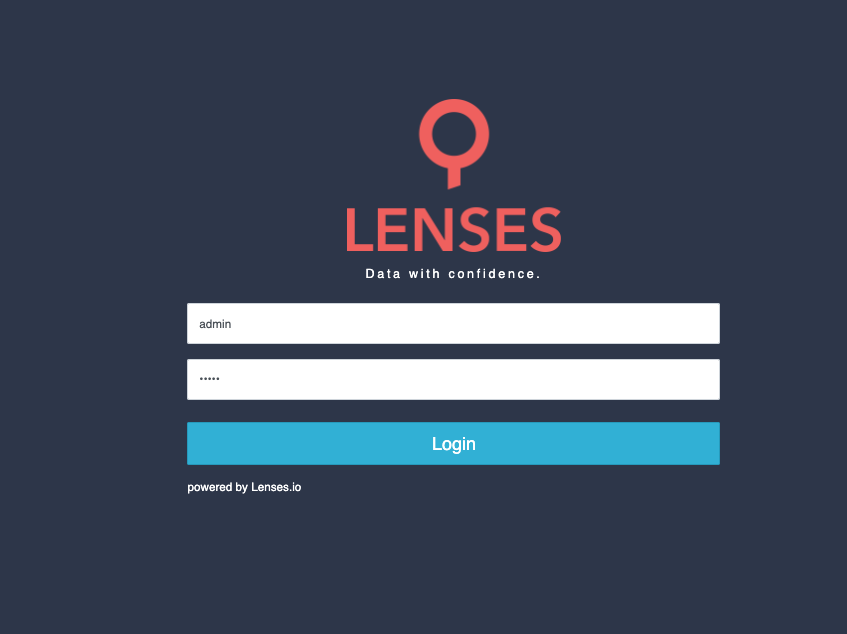
After logging in you should successfully land on http://127.0.0.1:3030/data and be able to view the main dashboard screen. Let's park Lenses for the time being and we will return to it later.
Let's start by creating our folder directory on our IDE, its structure. It looks like this:
On the pom.xml we declare all of the dependencies that we will be using - the full file can be found here.
CreditCard.proto holds our schema which looks like this:
Back to our IDE, let's produce the CardData.java file. We will need this later on to serialize our object to Protobuf, by typing (in a terminal window at the project location folder):
This will generate our Protobuf Java class and our updated folder structure should now look like this:
Opening our SendKafkaProto.java file we will see:
In the above snippet, we start by naming our package and importing the libraries that we will need later on. We then specify the properties of the Kafka broker, schema registry URL, and our topic name: protos_topic_cards.
Then, we construct some card objects using random data and we serialize the objects to Protobuf. Finally, we add the data to a record and send our records to the Kafka topic. Cool!
To test things out, let's package our code by typing the following in a terminal window at the project location folder:
After receiving the "BUILD SUCCESS" info on our terminal, let's execute it with:
Or in case you are using VScode you can right-click the file and select "Run Java" (make sure you have installed the Extension Pack for Java in case the option is not appearing).
At this point, you should see the "Sent Data Successfully" message to your console, which indicates that we have sent data to Kafka as expected.
Congrats! 🚀
Note: If you receive an error of type:
You need to map your localhost (127.0.0.1) to XXXXXXXX. Some instructions can be found here on stackoverflow and crunchify.
Back to Lenses - http://127.0.0.1:3030/data - let’s make sure we have successfully registered our schema to the schema registry by taking a look. From the left menu bar select Schema Registry:
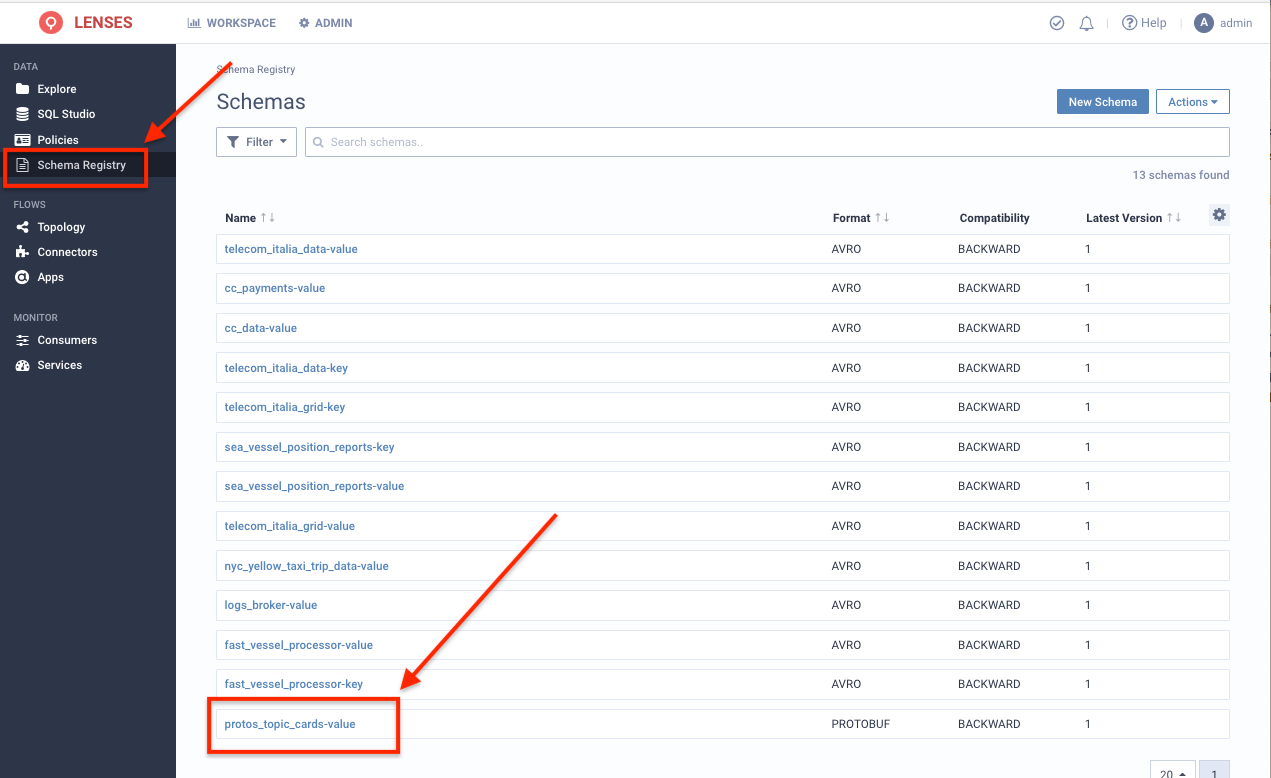
Our proto_topic_cards-value schema is there! Clicking on it to get its details we see that it’s almost identical to our initial schema:
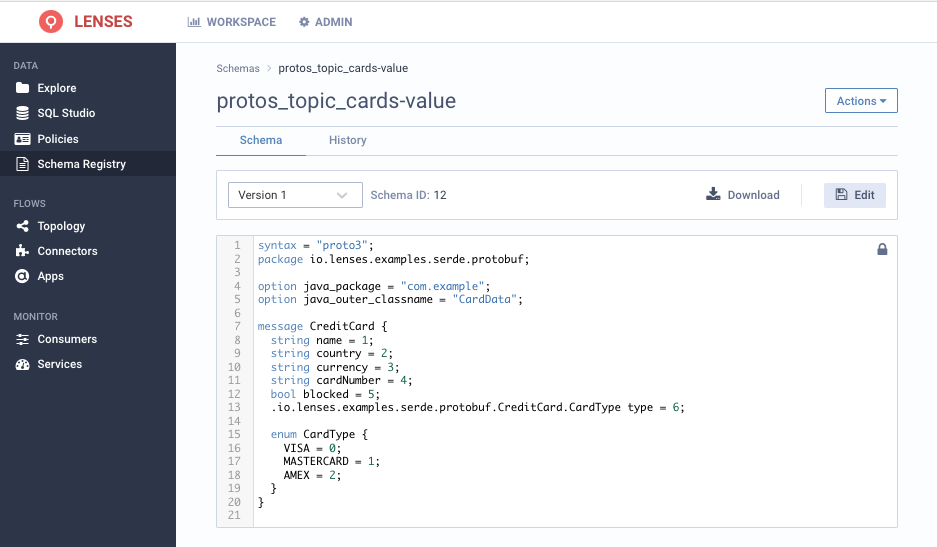
Notice that the schema we initially seeded is a slightly different version that gets overridden by the Protobuf Kafka serializer with a semantically- equivalent.
The Protobuf Kafka Serializer is still validating the record we publish against the existing schema (if one exists). It just automatically overrides it.
Next, time to return to Lenses and have a look at the data itself.
Let's navigate back to http://127.0.0.1:3030/data and from the top left menu select the explore option.
Landing on the explore screen we can see on our topics list that our protos_topic_cards topic is there, and Lenses has already picked up that its value type is Protobuf.
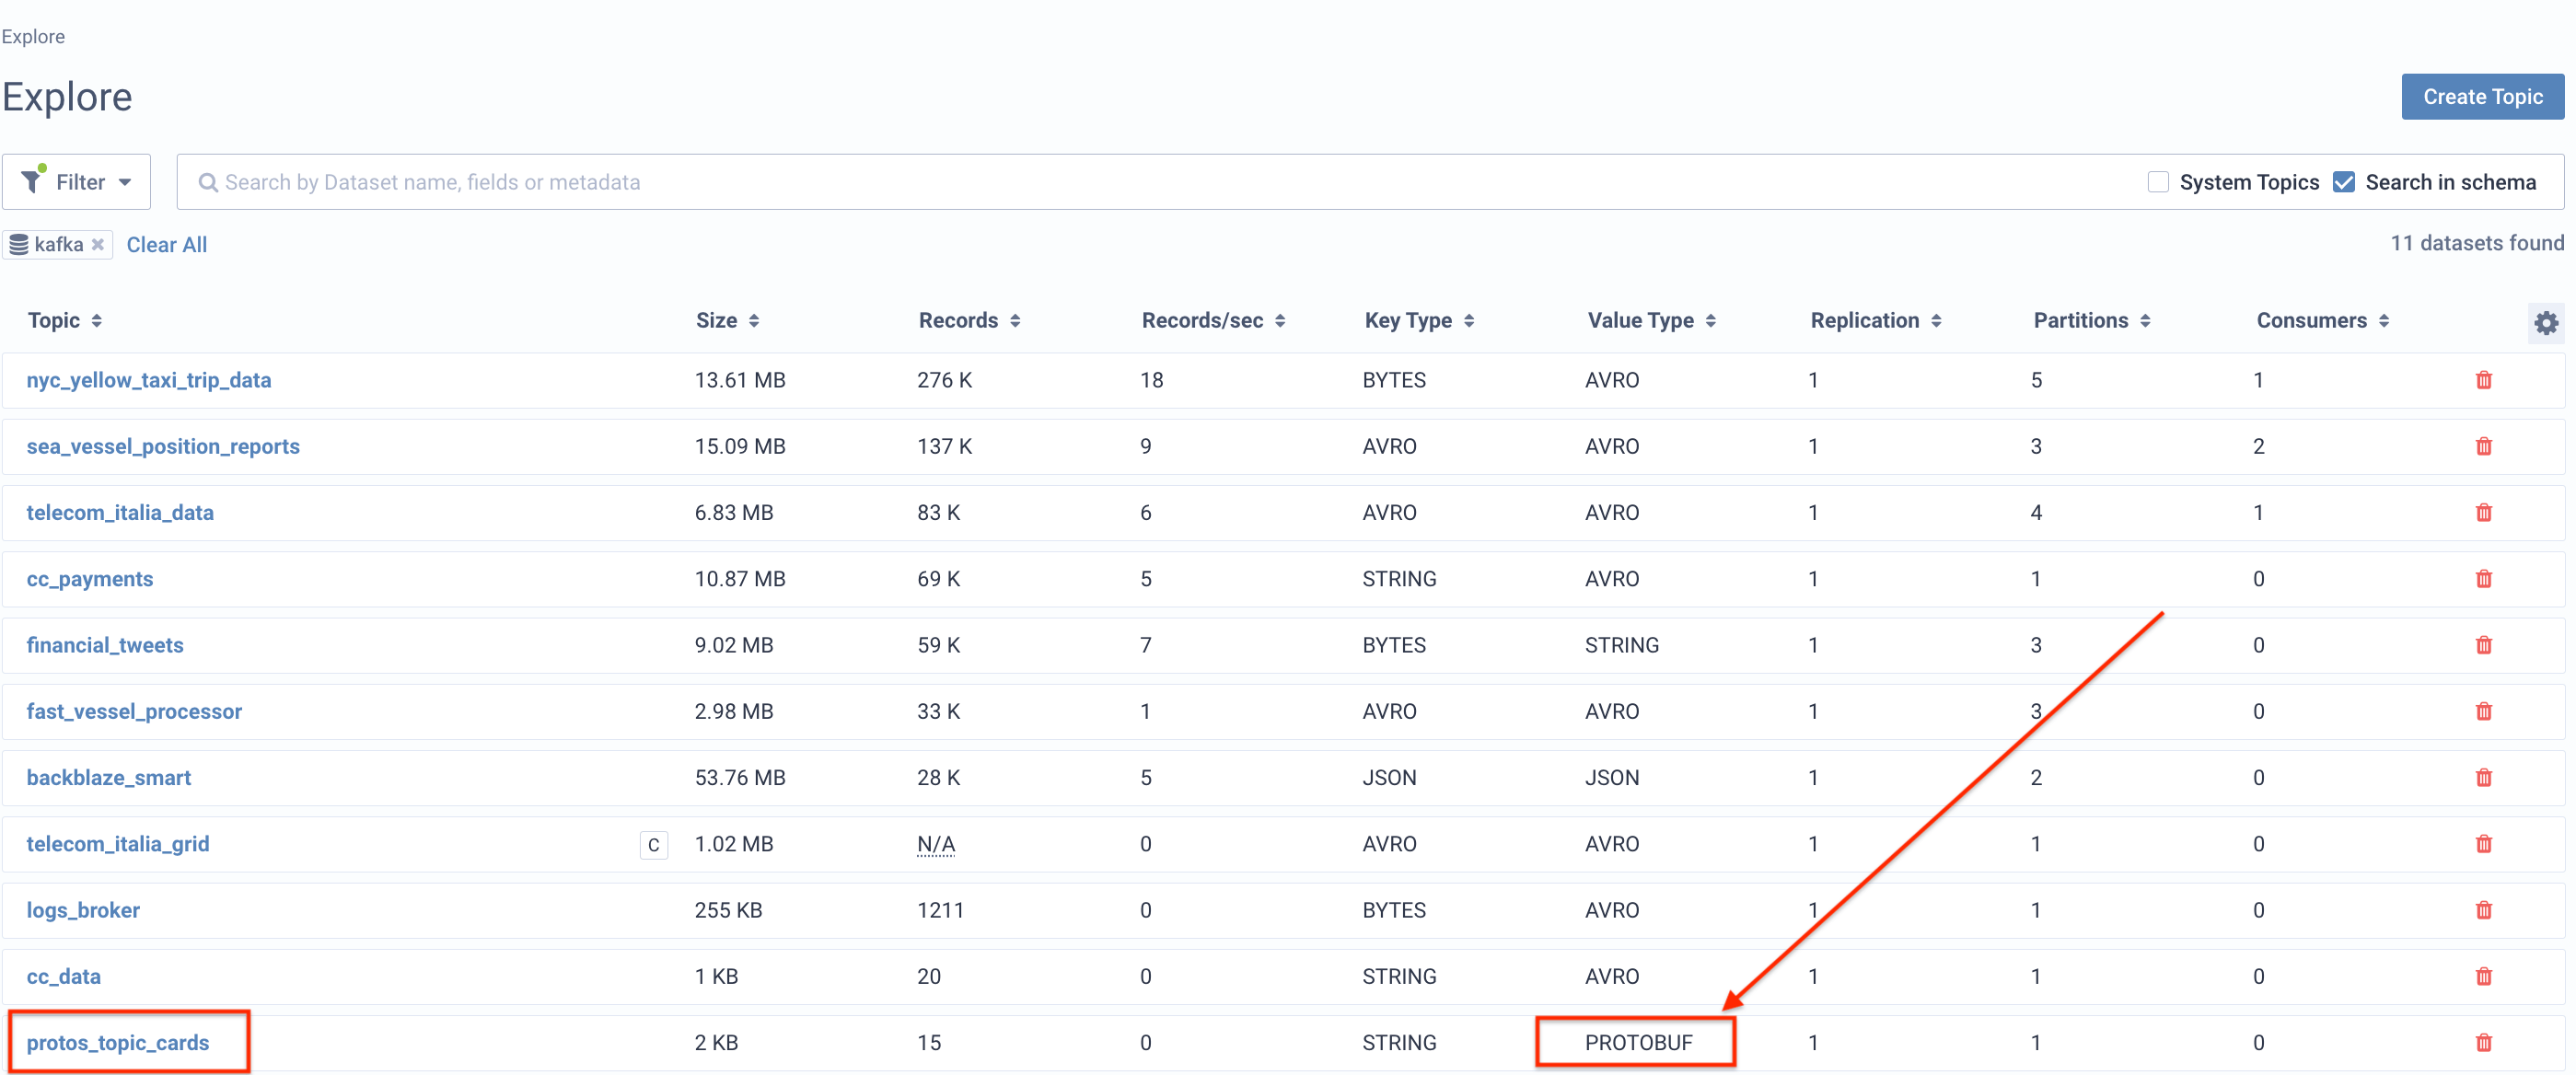
Since the schema exists in the schema registry and the data in the topic matches it, Lenses can figure out the link between the two. Clicking on our topic we can see the key and value for each record in a human-readable format - a proper data-catalog:
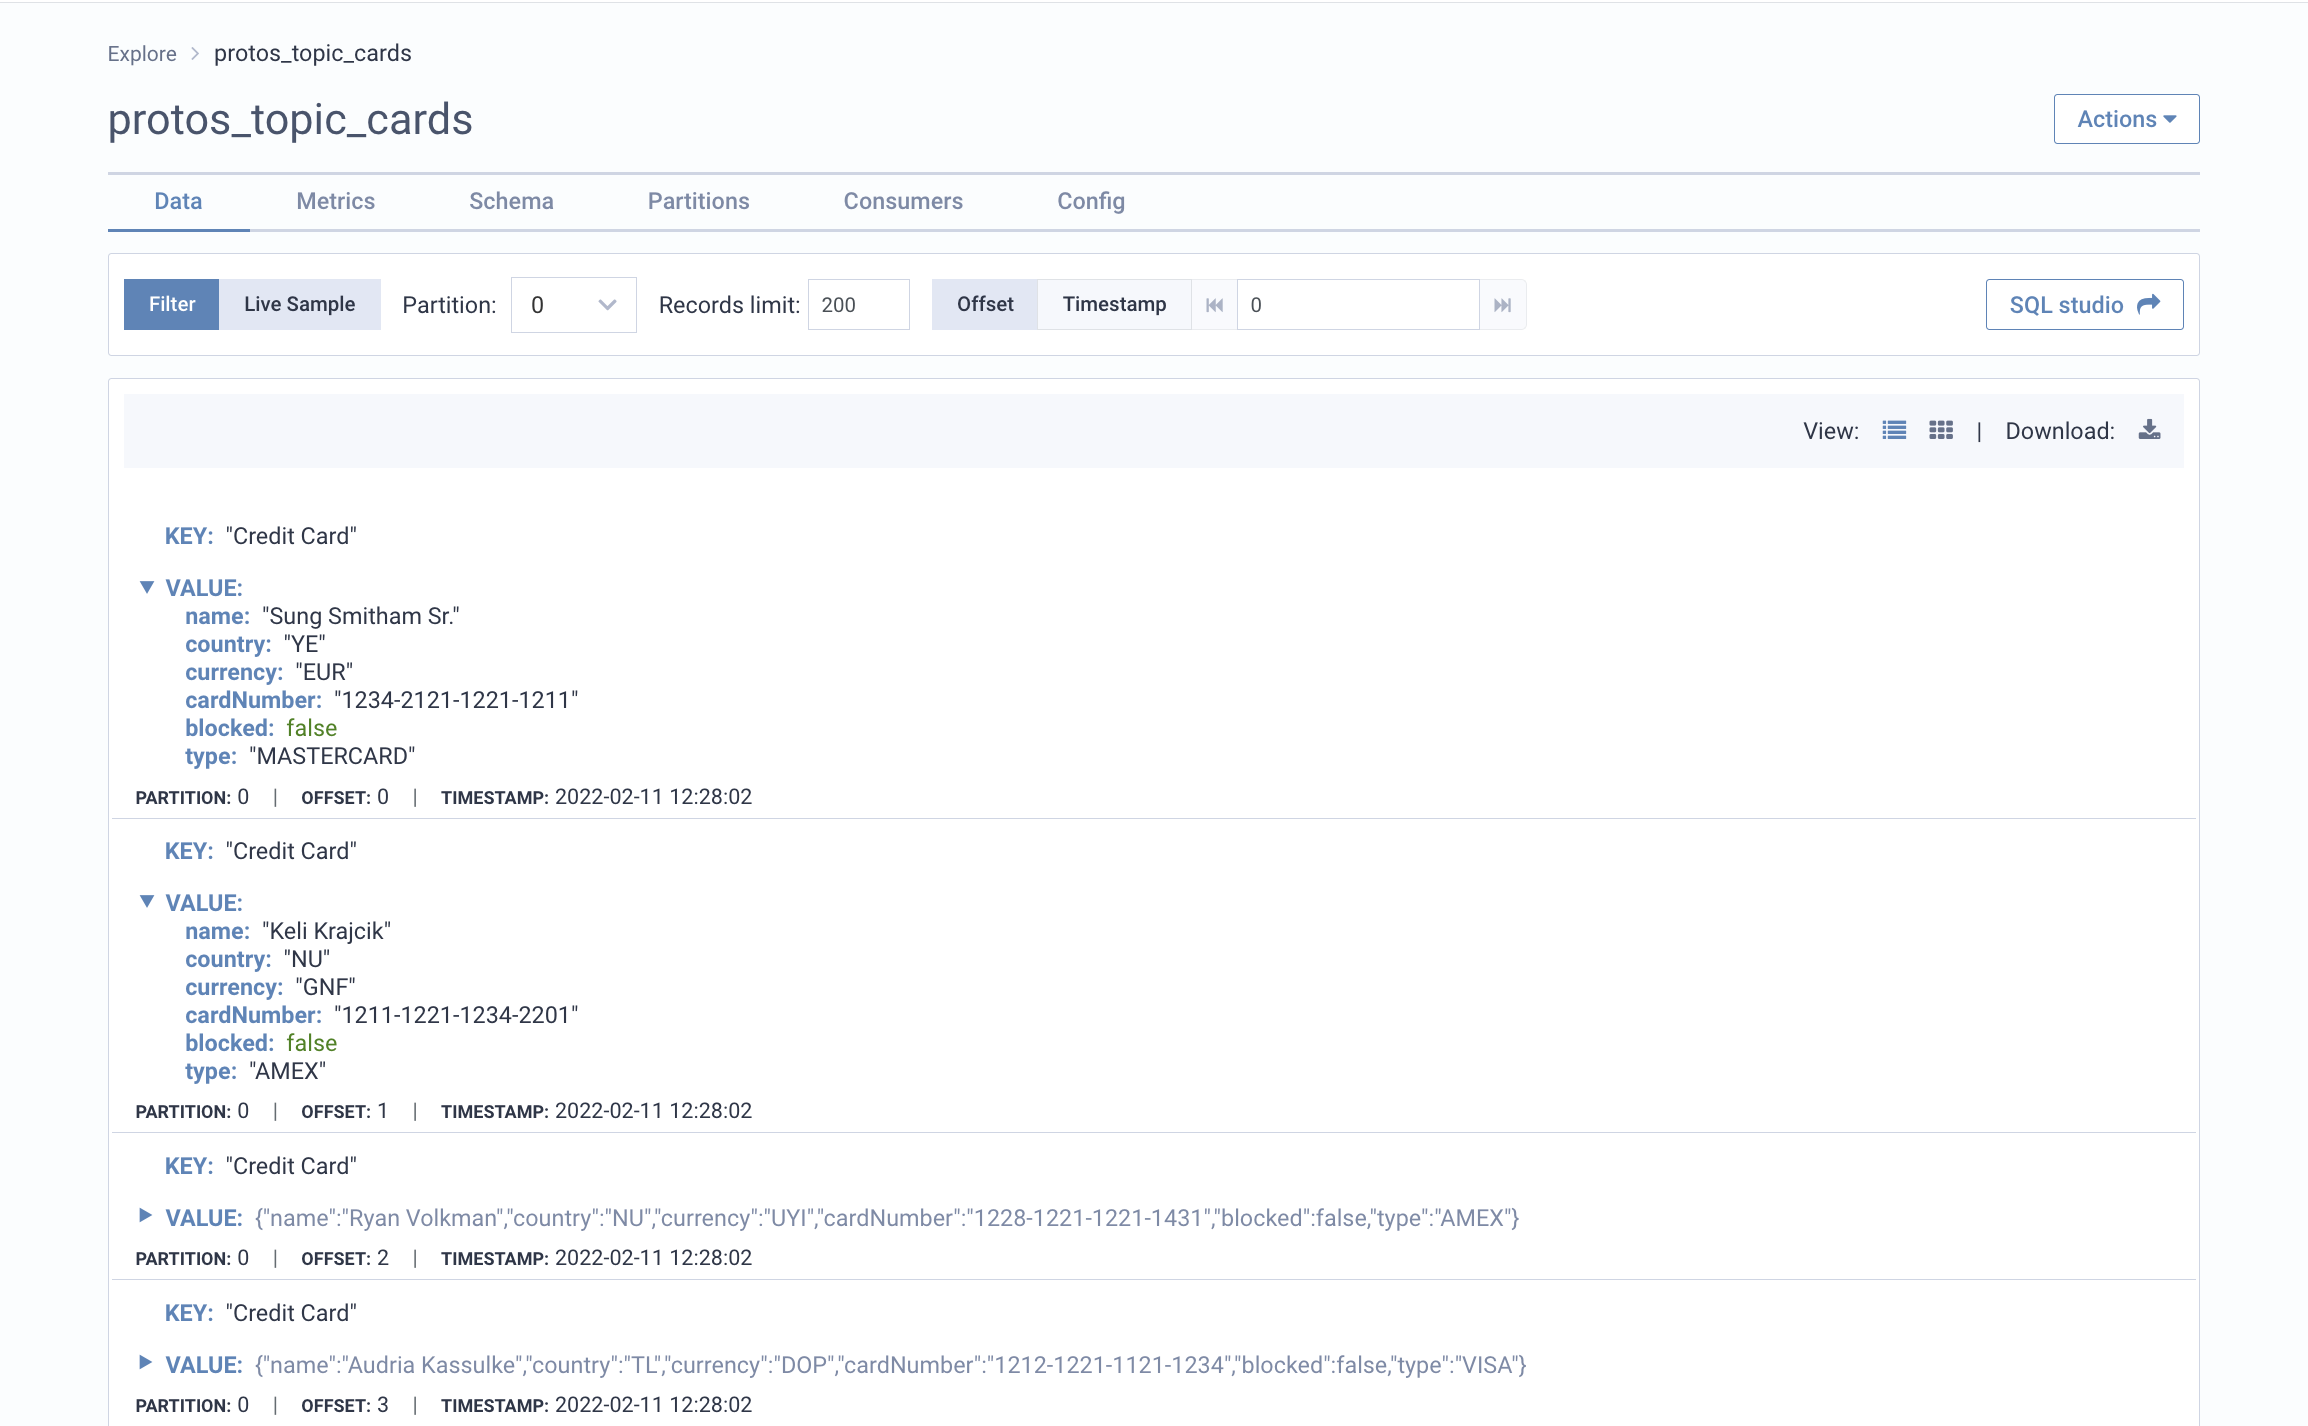
Without this, it would read as an unreadable byte array as that is how data is stored in a Kafka topic.
Lastly, let’s consume the data from our topic. We will consume the data in a local nodeJS application, spin up an Express Server, and preview the data in our Browser.
We are presuming that we already have npm and nodejs installed on our local machine but if that's not the case , download them here.
Let’s start by opening up a terminal window and initializing our project in a new directory by typing:
This will create a package.json file for us, looking like this:
Let’s then install the dependencies that we will use, by typing on our terminal:
This will update our package.json file with the dependencies included:
We will use Express to preview our data in the browser, Kafkajs to connect to Kafka, and @kafkajs/confluent-schema-registry to connect to our schema registry and be able to deserialize the message.
The last thing we need to do with our package.json file is to create our run script (the command that we will be using to run our application) is edit our scripts:
You can find the package.json file here.
So now by typing “npm run dev”, we actually run “node index.js” and execute the code that we have in our index.js file, which we need to create. So let’s create our index.js file (in the same directory), which will look like this:
For starters, we need to import all of our required packages for this to work. Then we provide the required Kafka information (brokers url, topic, schema registry.)
Then we subscribe to the protos_topic_cards topic, get the messages, push them to an array and log consumer details (topic, message value, headers) - just to make sure we are getting the data from Kafka.
Finally, we spin up the express server, set up its ‘/’ route, and map over the messages to send our response and be able to preview to our browser. To do so we need to stringify the messages in JSON. Our server listens on port 5000.
OK, let’s have a look at what we produced. Looking at our http://localhost:5000 we can see the data in our browser:
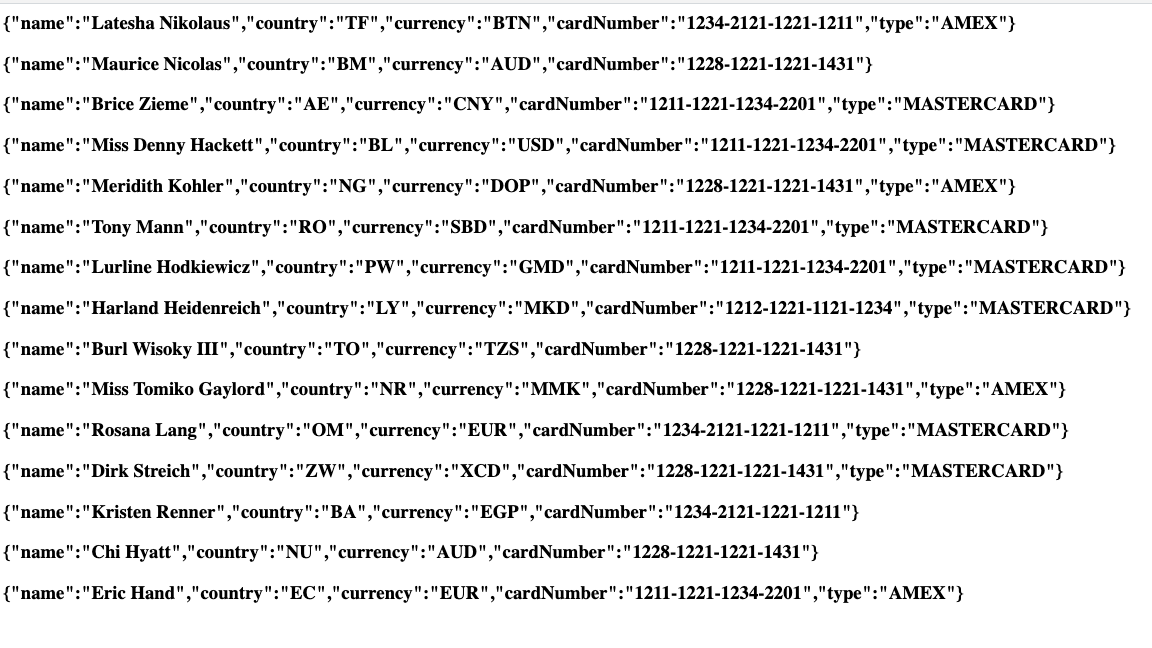
And with this, we have successfully sent data, in a Protobuf format, from a java application to Kafka, had a look at what's inside our topic utilizing Lenses, and consumed that data in our Node.js application. Good stuff!
Useful links:
Github source code for Java App: https://github.com/eleftheriosd/Protobuf-To-Kafka
Github source code for Node.js App: https://github.com/eleftheriosd/Node.js-Kafka-consumer
Lenses box download: https://lenses.io/apache-kafka-docker/