Christina Daskalaki
Kafka Connect sink to Elasticsearch
Create a Kafka Connect Pipeline using the Kafka Development Environment to move real-time telemetry data into Elasticsearch & visualize the positions in a Kibana Tile Map


Christina Daskalaki
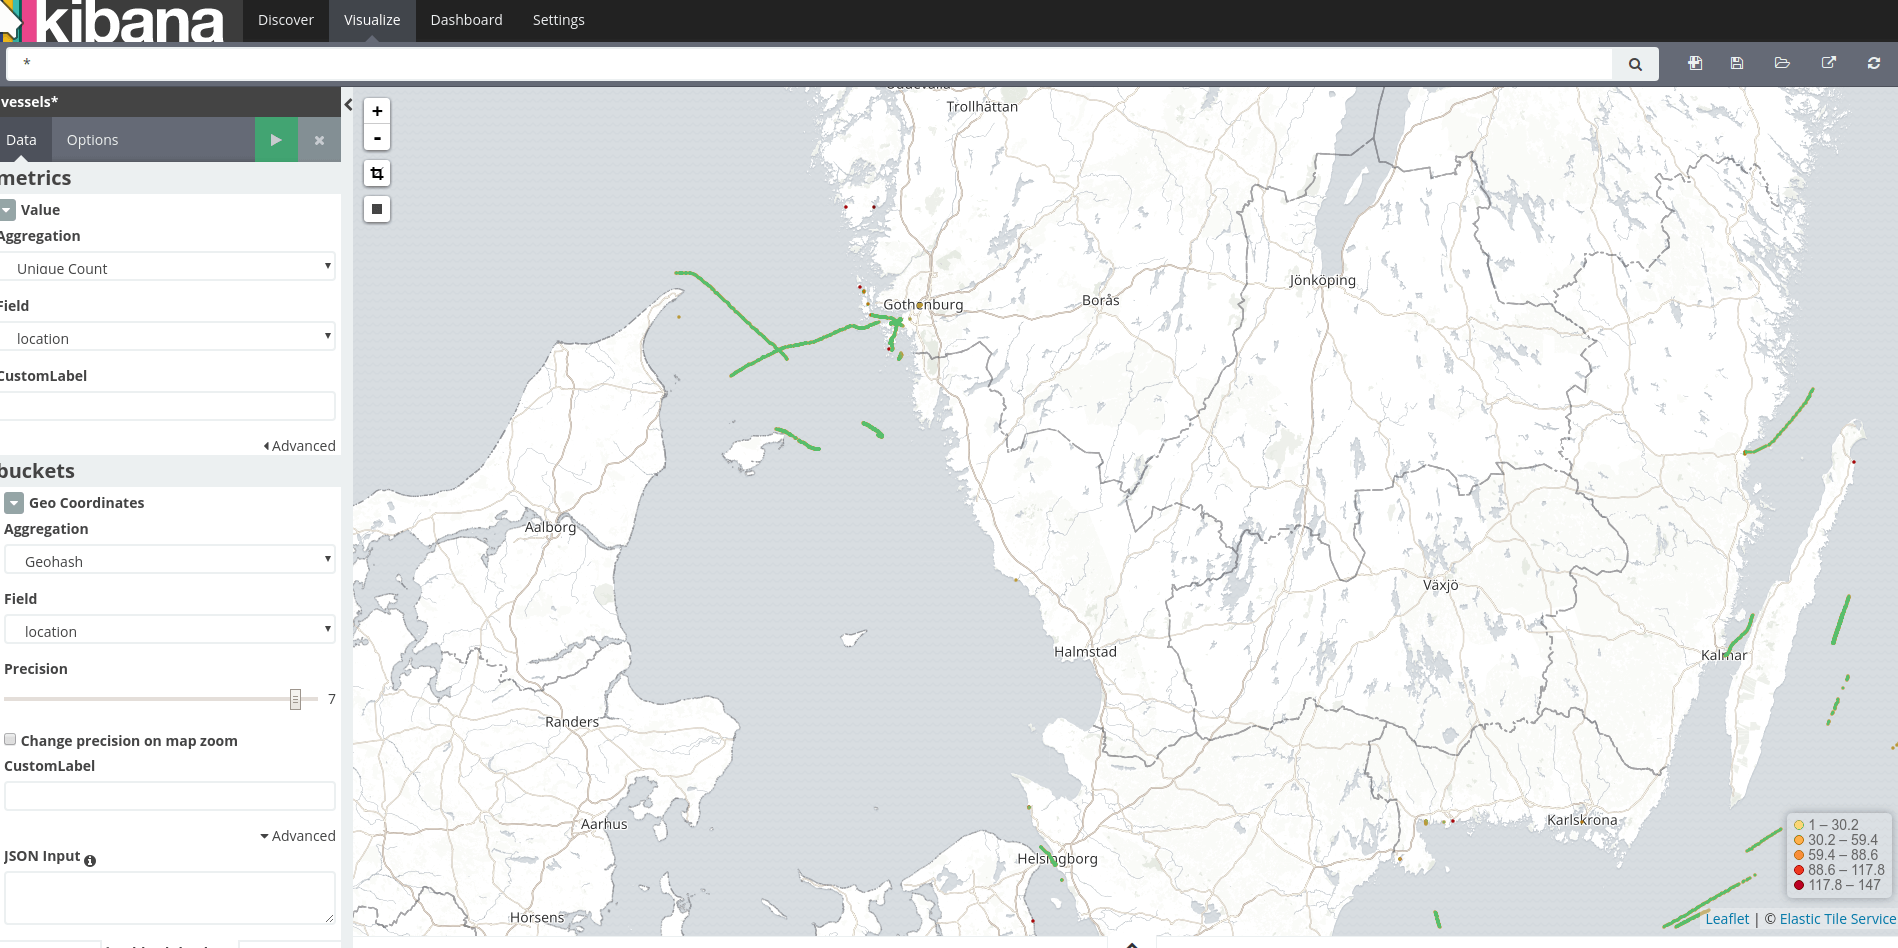
In this mini tutorial we will explore how to create a Kafka Connect Pipeline using the Kafka Development Environment (fast-data-dev) in order to move real time telemetry data into Elasticsearch and finally visualize the positions in a Kibana Tile Map by writing zero code…!
Kafka Connect
You have most probably come across Kafka Connect when you require to move large amount of data between data stores. In case you haven’t, Kafka Connect is one of the core Kafka APIs that allows you to create custom connectors, or find one for your case and run it in an easily scalable distributed mode. Most of the well known systems have already a connector available and today we will explore Elasticsearch.
Fast-Data-Dev
Kafka Development Environment is a docker image that provides all you need to get started and developing with Kafka, including the Confluent Platform Schema Registry and Rest Proxy, the Lenses.io Web Tools and also exposes advanced features ie. security and jmx. The docker image comes with running examples and most importantly a set of 25+ well tested connectors for the given version. Follow the documentation in order to customize the execution or disable features as convenient.
Elasticsearch
One of the most popular search engines based on Lucene. Elasticsearch provides schema-free JSON documents storage and
also comes with Kibana, an open source visualization plugin to create real time dashboards.
There are a couple of different Elasticsearch Kafka Connectors in the community,
but today we are going to explore stream-reactor/elasticsearch.
To demonstrate this tutorial on our local environment, we are going to use Docker, so make sure you have docker already installed.
We need to set up the target system, so for this tutorial an Elasticsearch docker image. Then we need Kafka, Zookeeper, Kafka Connect, Avro Schema Registry, and connectors which we will get them all packaged in Fast-Data-Dev image. We will also use a Kibana container in order to visualize the results at the end of the pipeline.
Open your terminal and start 3 dockers:
Verify your Kafka Development Environment is up and running by navigating to http://localhost:3030. Give it few seconds to set all the services.
From the fast-data-dev dashboard you may navigate to the rest of the Web Tools (Schema Registry, Kafka Topics & Kafka Connect, but also enter the docker bash where you can access all the Kafka CLI tools.
Keep in mind that fast-data-dev by default will start running integration tests and examples.
In case you want to enable this you may omit the -e RUNTESTS=0.
After running the containers, your $ docker ps should look like this:
Before we do this step lets take a step back and have a look at our data. Once we set everything up, we are going to produce some real time position AIS data. AIS is a marine traffic open system that produces position data for all the ships worldwide and it’s a great example to get enough locations to simulate heavy loads. We have used the generator in a previous post, and it’s linked down to the resources.
The payload of the messages in Kafka looks like this:
but we are only interested to extract the MMSI unique ID of the vessel and the location in order to make geospatial queries.
Elasticsearch allows to create geo_point fields. To achieve the mapping we need to create the elastic index that will host the data,
and then specify the geo_point:
Open your Kibana at http://localhost:5601/.
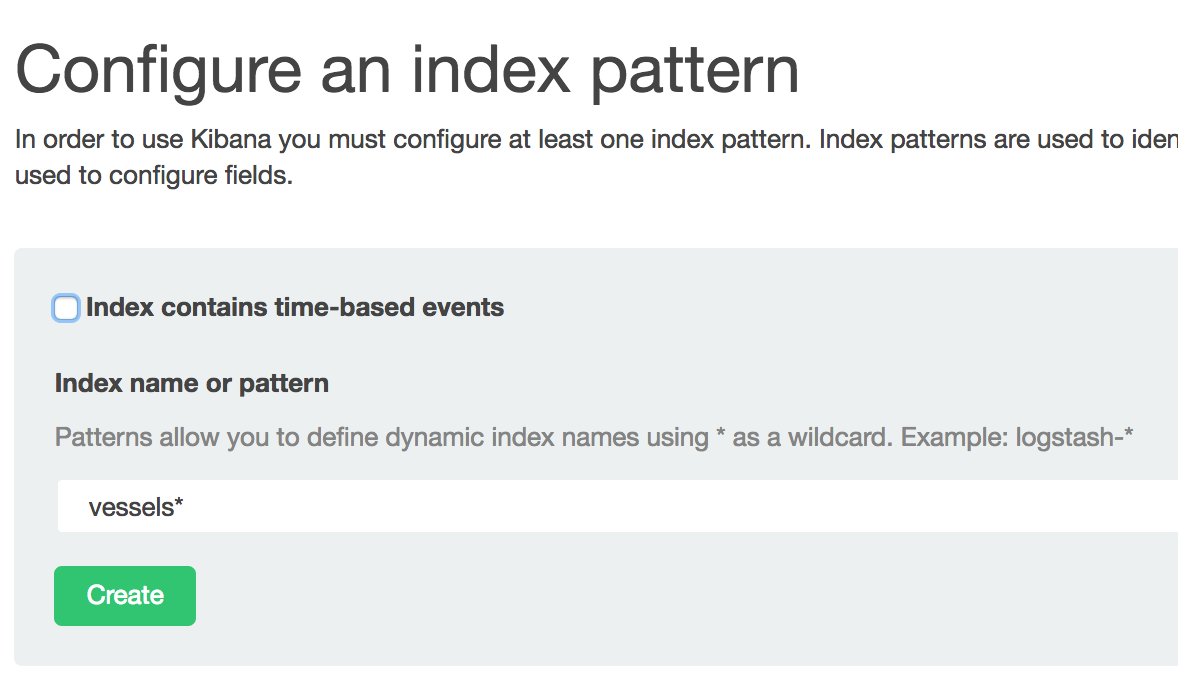
You will be asked to create an index:
At Discover tab your index should be empty:

The Elasticsearch connector is already available in fast-data-dev so you only need to configure it!
In a real deployment process you need to make the connector available in your classpath yourself,
but for now we have done this for you. You can verify which connectors are available in your environment
by navigating to the Kafka Connect UI localhost:3030/kafka-connect-ui/ and click NEW.
Kafka Connect also provides a REST interface to manage the connectors. If you want to use this from outside your docker, for example to include it in your Continuous Integration, you will need to expose the relevant ports.
The properties for our example are below. On your kafka-connect-ui, select New -> Elasticsearch sink and add the properties as follows:
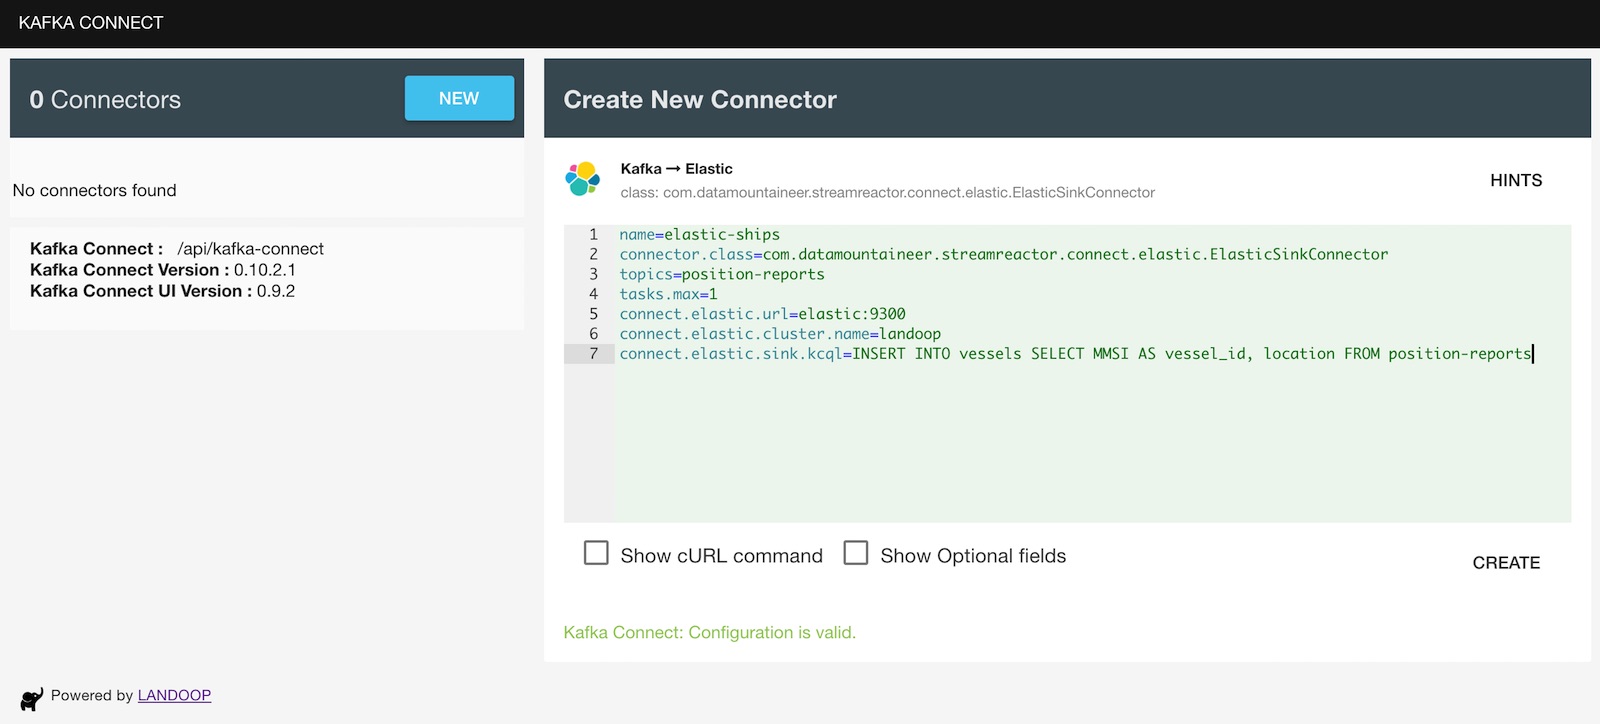
So, if it’s the first time you set up a connector, you may wonder where these properties come from. In Kafka Connect every connector exposes a set of properties required. Some of those are default properties required by the Kafka Connect API such as
the name of the connector, which needs to be a unique string for your connect cluster,
the connector.class which specifies which Kafka Connect plugin to use,
and tasks.max which will instruct the workers how many processes to run.
As fast-data-dev is a single docker instance, only one worker will be spun up as part of the connect cluster. Tasks may run on separate processes or separate nodes and it’s the way connect scales horizontally.
Of course, every datastore requires specific properties, such as the connect.elastic.*, properties which will allow
the connection with the target system, in our case Elasticsearch docker image we spawn at step 1.
You can verify the connector is up and running at the Kafka Connect UI http://localhost:3030/kafka-connect-ui.
One of the most common situations when you source raw data from a system is that you might not need all of the fields to be stored on your target datastore. You have multiple options for this case. For example to use a stream processing framework such as Spark Streaming or Apache Flink, but this will require a separate infrastructure to execute them, or use Kafka Streams library to build your application. Of course for complex topic to topic transformations this is the route you may need to take.
In any case this will require a bit of engineering effort, but as I promised we write no code in this example. Another option is to use KCQL which is just an additional field in the Elasticsearch connector configuration. This will allow us to extract the fields we need by simply adding a SQL like query.
KCQL is and open source library embedded in many connectors and you will find it available in your fast-data-dev distribution. For most of them you will also find support for advanced data structures specific to several sink systems.
The above query extracts MMSS and location fields from the payload of the source messages from the Kafka topic
position-reports and will only store these in Elasticsearch. Additionally, it allows us to rename the MMSI field
into vessel_id.
Now that we have everything up and running lets use the AIS generator to see some data piping through.
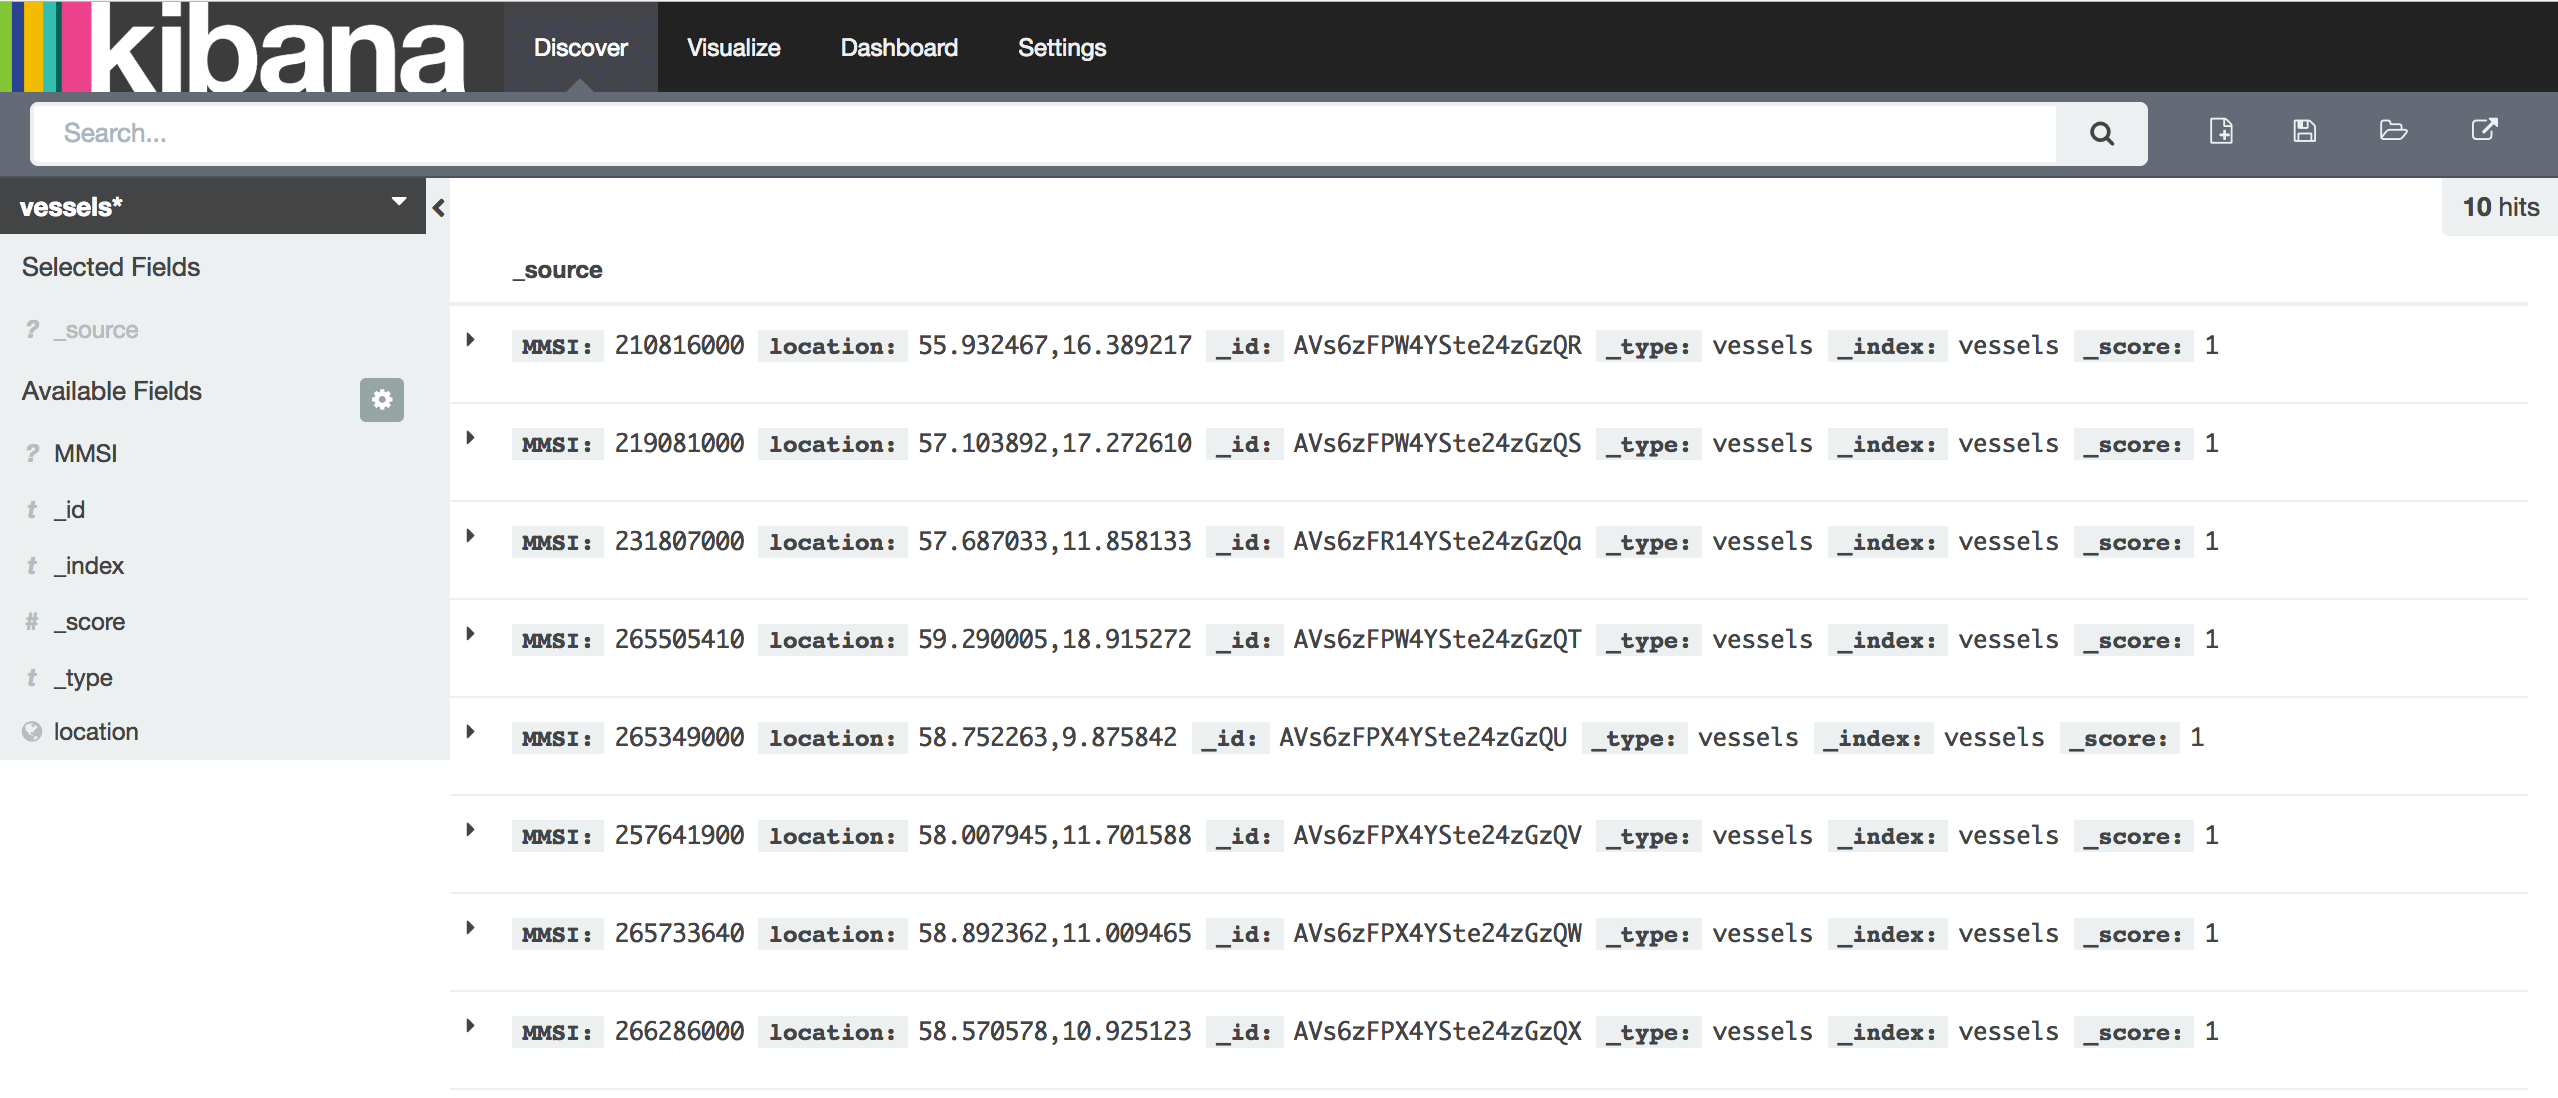
Back to your Kibana you should be able to see data in the index vessels
Kibana provides Tile Map visualisation. On the visualisation tab, select the Tile Map and the correct index by following the instructions.
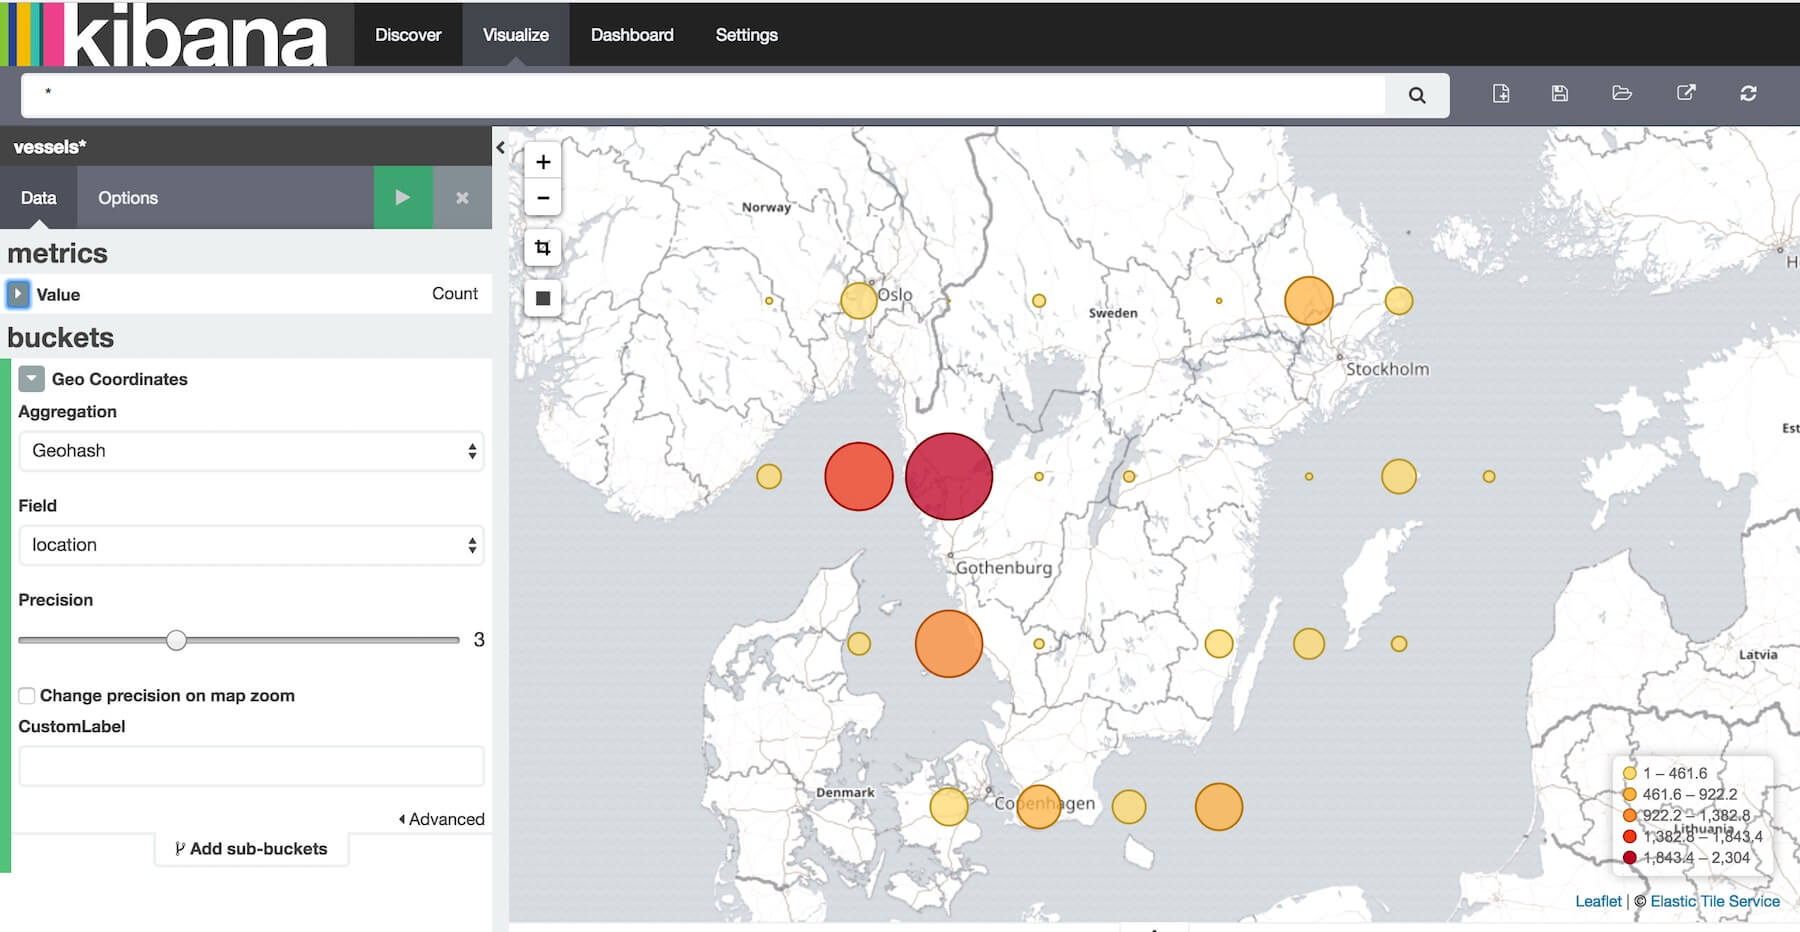
In the above map you will see the position reports logged from each point (geo box). Note that the reports come over time, so this isn’t an instance but more of an aggregation with multiple position reports coming from each vessel over time.
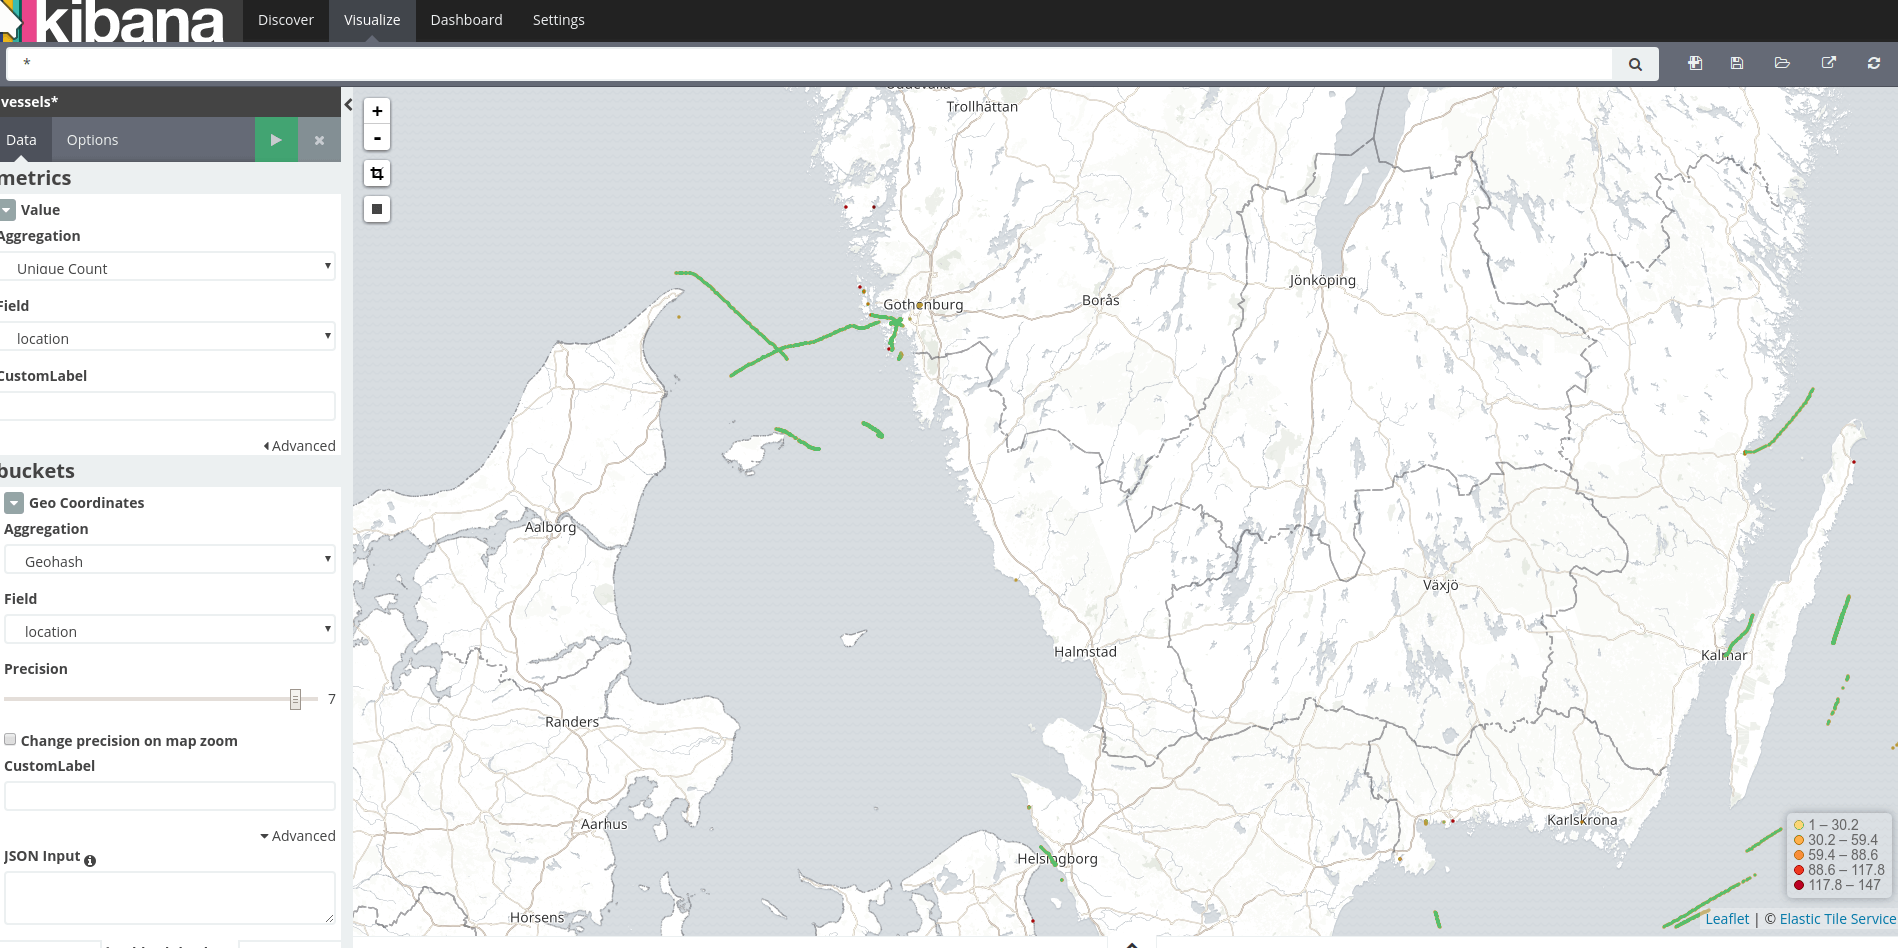
If you increase the precision, you will be able to deduce the course of each vessel:
Finally, clean up the docker images after this tutorial:
Even though the process for moving Kafka Connect to production is straightforward, there are few options you have here. Kafka Connect is stateless, since it stores all the state for the configs and the committed offsets within Kafka itself. So, it becomes a perfect candidate for Docker containers. One very common pattern is to dockerize your connect clusters and manage them in your container host for example Kubernetes. Depends on your use case, you might need to execute a set of containers as a batch process or get real time records. Maybe this is out of scope for this tutorial, but we will discuss production deployments in a separate post.
Looking for a fast way to create Kafka pipelines? Have a look at Lenses, a powerful tool and UI for you Kafka installation, with SQL support, free connectors, and more.
So, in this tutorial we managed to demonstrate an end-to-end pipeline from raw real time position data that land into a Kafka topic, extract the fields we require for our application, sink them in Elasticsearch and finally get them visualized in a Kibana dashboard. This is a simple pipeline that allows us to do a fields extraction transformation by writing no code, just by configuring the Elasticsearch Kafka Connector with the correct KCQL query. The connector takes all the headache to manage the connections, failovers, scalability and many more.
Reasons and challenges for Kafka replication between clusters, includi...
Andrew Stevenson
Ready to get started with Lenses?
Download free